
Receiving your first injection blow molding machine is an exciting milestone — and a critical one. The decisions made during installation and initial startup directly determine whether your line achieves its designed output quality and speed, or spends its first months fighting preventable problems. This guide walks first-time operators and plant engineers through every stage from site readiness to first-article sign-off, in the sequence that matters.
The process described here applies to rotary IBM machines in the 40–200 tonne clamping range. Specific values may vary by model; always cross-reference with your machine manual. Browse the IBM machine range if you are still selecting a model.
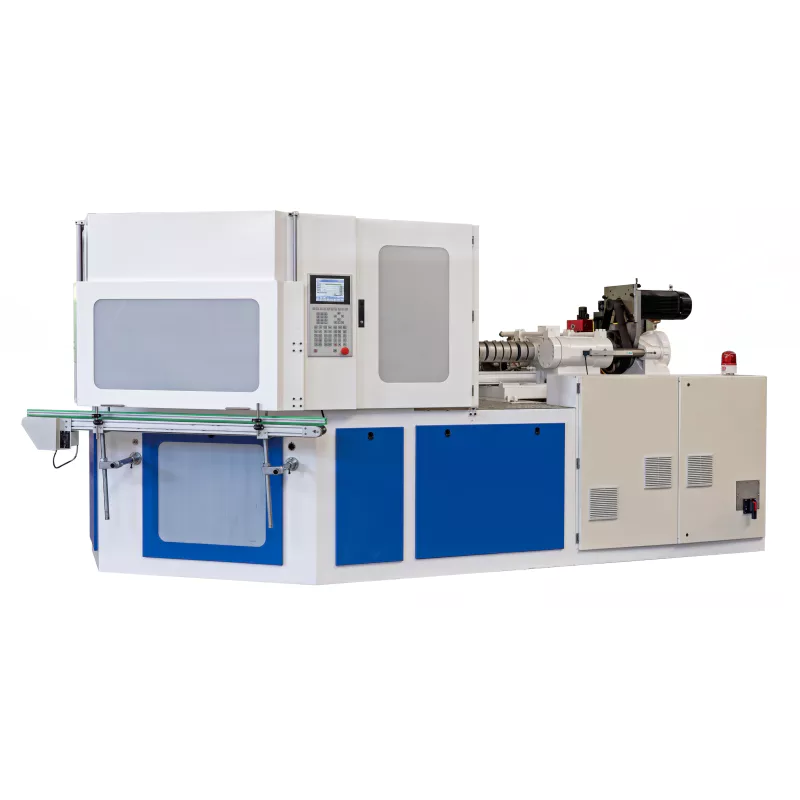
Fig 1 — ZQ80 IBM machine: a popular model for pharmaceutical and cosmetic bottle production
1. What New Operators Need to Know Before Startup
IBM machines integrate hydraulic, pneumatic, electrical, and thermal systems into a single automated process. A failure in any one subsystem can cause cascade defects that are misattributed to a different root cause. New operators benefit most from understanding how the systems interact, rather than memorising isolated settings.
Key principle: the sequence matters. Attempting to run production before utilities are stable, molds are properly aligned, or materials are adequately dried is the single most common source of first-start problems. Follow the steps in order, do not skip, and document every reading.
2. Site Preparation: Space, Power, Compressed Air, and Cooling
Floor Space
Allow machine footprint + 1.5 m on all sides for operator access, mold trolley movement, and downstream conveyor. Ceiling height minimum 3.5 m for overhead crane access during mold changes. Floor load capacity min. 8 t/m².
Power Supply
380V / 50 Hz / 3-phase is standard for most IBM machines. Install a dedicated breaker at 1.25× machine rated current. Voltage fluctuation must stay within ±5%. Include earth leakage protection (30 mA RCD).
Compressed Air
Supply at 0.8–1.0 MPa (8–10 bar) through a 1-inch minimum main line. Install an air dryer and 5-micron filter upstream to prevent moisture and contaminants entering blow circuits. Dedicate a separate compressor if factory air is shared and pressure drops below 0.7 MPa under load.
Cooling Water
Chilled water at 8–15 °C, flow rate per manufacturer spec (typically 8–20 L/min per machine). Install a dedicated chiller if ambient-temperature cooling water is above 20 °C. Use treated water to prevent scale build-up in mold cooling channels.
3. Machine Installation and Levelling
Place the machine on a prepared concrete pad (minimum 200 mm thick C25 concrete, fully cured). Use the machine levelling bolts or adjustable feet to level the platen surfaces to within 0.5 mm/m in both axes — checked with a precision spirit level. Incorrect levelling causes uneven mold clamping force, leading to flash and premature mold wear.
After levelling, anchor the machine to the floor using the provided anchor bolt holes. Torque anchor bolts to specification. Connect all utility lines (power, water, air) and verify there are no leaks before energising.
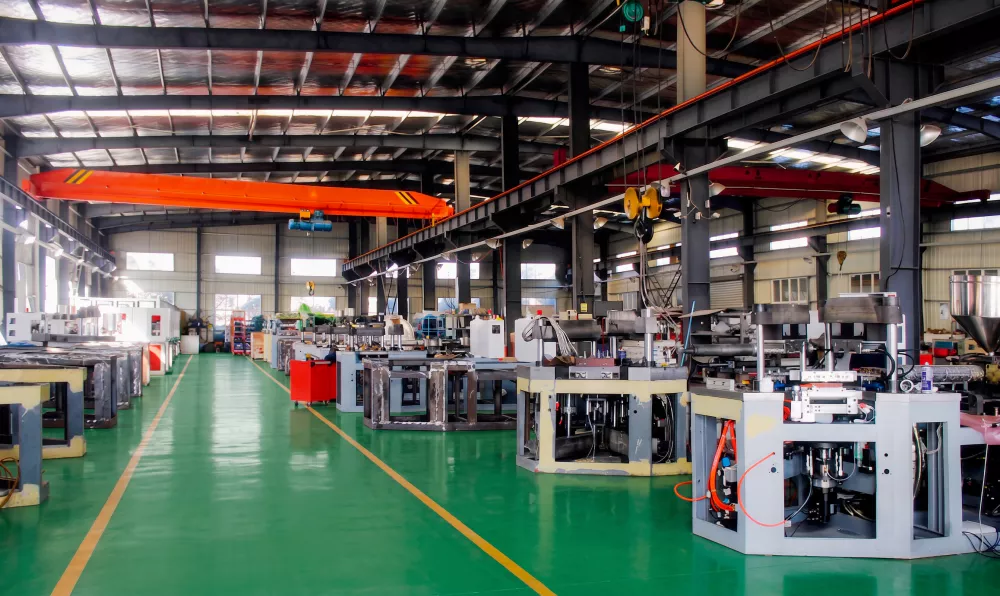
Fig 2 — Properly arranged IBM machine factory with adequate aisle clearance for operator safety
4. Mold Installation and Alignment
Mold installation on an IBM machine is more complex than on a standard injection press because both the injection mold and the blow mold must be installed and co-aligned on the same rotary table. Proceed as follows:
- Clean platen and mold mounting faces; remove any rust, burrs, or contamination.
- Lift mold with overhead crane or mold trolley — never manually lift molds above 25 kg.
- Slide mold onto platens and hand-tighten mounting bolts in a cross pattern.
- Check core rod alignment with the injection mold cavity using a dial gauge (max. runout 0.05 mm).
- Torque all mounting bolts to specification in three stages: 30% → 70% → 100%.
- Connect cooling water hoses and verify flow through all circuits.
- Manually rotate the table one full revolution to verify clearance at all stations.
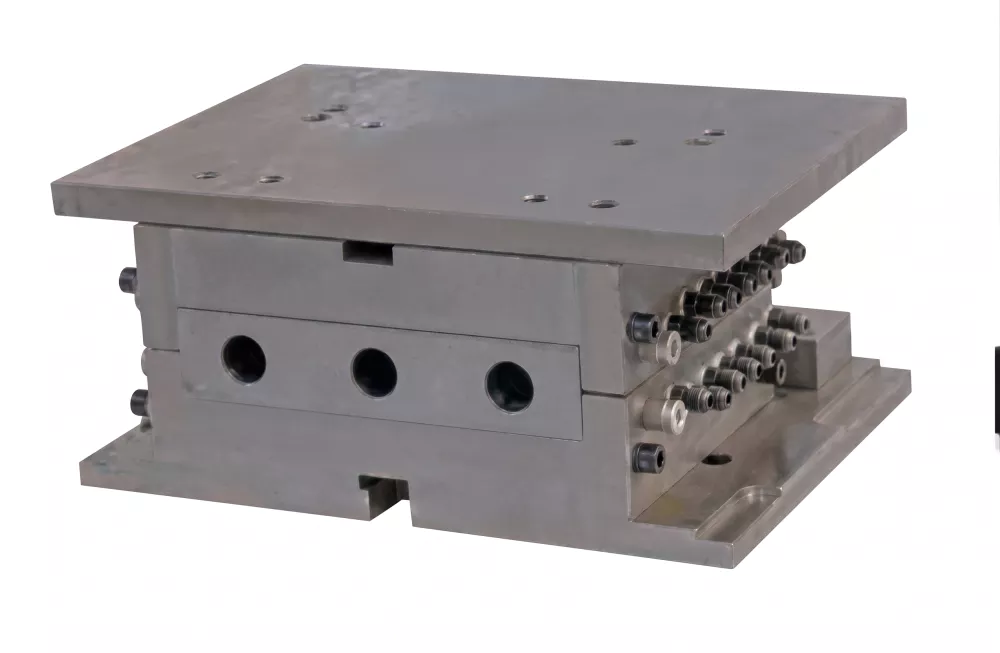
Fig 3 — Proper injection mold mounting with verified core rod alignment before first run
5. Material Loading and Drying Procedure
| Material | Drying Temp (°C) | Drying Time (hrs) | Target Moisture |
|---|---|---|---|
| PP | 80–90 °C | 2–4 h | <200 ppm |
| HDPE | 70–80 °C | 1–2 h | <300 ppm |
| PET | 160–170 °C | 4–6 h (desiccant) | <50 ppm |
| PVC | 60–70 °C | 1–2 h | <200 ppm |
After drying, load material into the hopper with the feed gate open. For the first start, purge the barrel with 3–5 shots of the same grade material to displace any packing or previous material before closing the mold.
6. Setting Process Parameters: Temperature, Pressure, Cycle Time
Enter parameters on the HMI in the following sequence to avoid inadvertent injection before the barrel is at temperature:
- Set barrel zone temperatures — enter setpoints and allow a full 30-minute heat soak after the HMI shows “at temperature” before proceeding. Thermal gradients persist inside the barrel for 15–20 minutes after the surface thermocouple reaches setpoint.
- Set injection parameters — start with 60% of maximum injection pressure, 50% injection speed, and verify fill quality before increasing.
- Set blow parameters — begin at 6 bar blow pressure and 4 seconds blow time; adjust after inspecting first samples.
- Set cycle time — use the machine auto-cycle starting mode at 130% of target cycle time, then reduce incrementally.
- Enable cooling circuits — verify coolant flow rate and inlet temperature are within specification before starting auto-cycle.
7. Trial Run and First-Article Inspection
Run 10–20 trial shots before any quality inspection. The first 5–10 shots are typically discarded as the barrel and mold reach thermal equilibrium. Collect 5 consecutive bottles from a stable auto-cycle and inspect the following:
- Wall thickness — measure at 6 points around the body with an ultrasonic gauge; max. variation <15%.
- Neck finish dimensions — thread OD, T-dimension, and S-dimension per closure manufacturer tolerances.
- Closure torque test — apply closure and measure application and removal torque.
- Visual surface quality — inspect for flow lines, sink marks, surface haze, or short shots.
- Volume/capacity test — fill bottle with water and weigh to verify nominal volume.
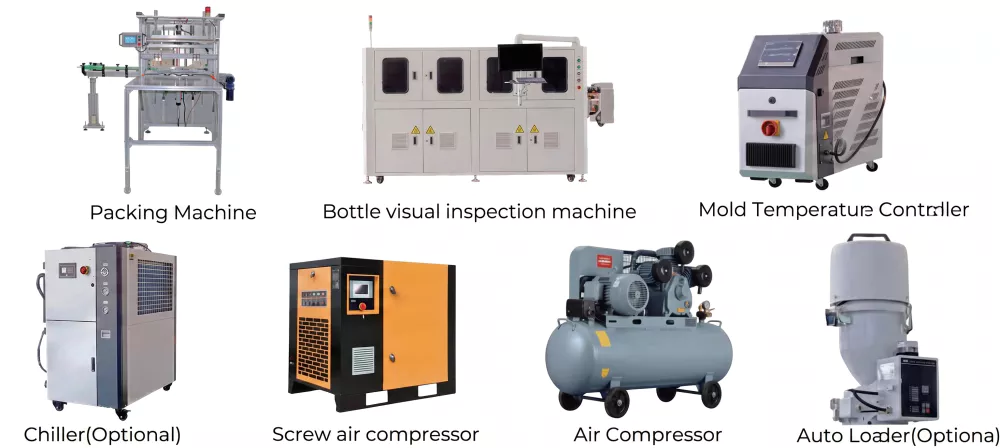
Fig 4 — Auxiliary equipment (hopper dryer, chiller, conveyor) essential for a complete IBM production line
8. Common Startup Errors and How to Avoid Them
| Error | Root Cause | Prevention |
|---|---|---|
| Surface splay / silver streaks | Undried material | Verify drying time and moisture level before startup |
| Short shot / incomplete preform | Low melt temperature or injection pressure | Perform 30-min heat soak; increase pressure incrementally |
| Flash at parting line | Machine not levelled; mold clamping insufficient | Re-level machine; verify clamping force setting |
| Bottle deforms after ejection | Insufficient blow time or mold cooling | Increase blow hold time; check chiller outlet temperature |
| Core rod misalignment | Incorrect mold installation | Re-check dial gauge runout; re-align mold on platen |
9. Safety Guidelines for IBM Machine Operation
- Never reach into the mold area while the machine is in auto-cycle — always switch to manual mode and de-energise before any mold access.
- Wear heat-resistant gloves and safety glasses during purging operations — molten plastic purge can reach 250 °C.
- Ensure all safety guards and interlocks are operational before starting auto-cycle. Do not bypass door interlocks.
- Ventilate the work area when processing PVC to prevent build-up of hydrogen chloride fumes.
- Keep a Class D fire extinguisher within reach — smouldering plastic fires require powder or sand, not water.
10. Recommended Operator Training Checklist
Pre-Production Checklist
- ☐ Utilities verified (power, air, water)
- ☐ Machine levelled and anchored
- ☐ Molds installed and aligned (dial gauge <0.05 mm)
- ☐ Cooling circuits connected and flow verified
- ☐ Material dried to specification moisture level
- ☐ Parameters entered on HMI and heat soak completed
- ☐ Safety guards and interlocks confirmed operational
- ☐ Purge completed with 3–5 clean shots
- ☐ Trial run of 20 shots completed
- ☐ First-article inspection passed and documented
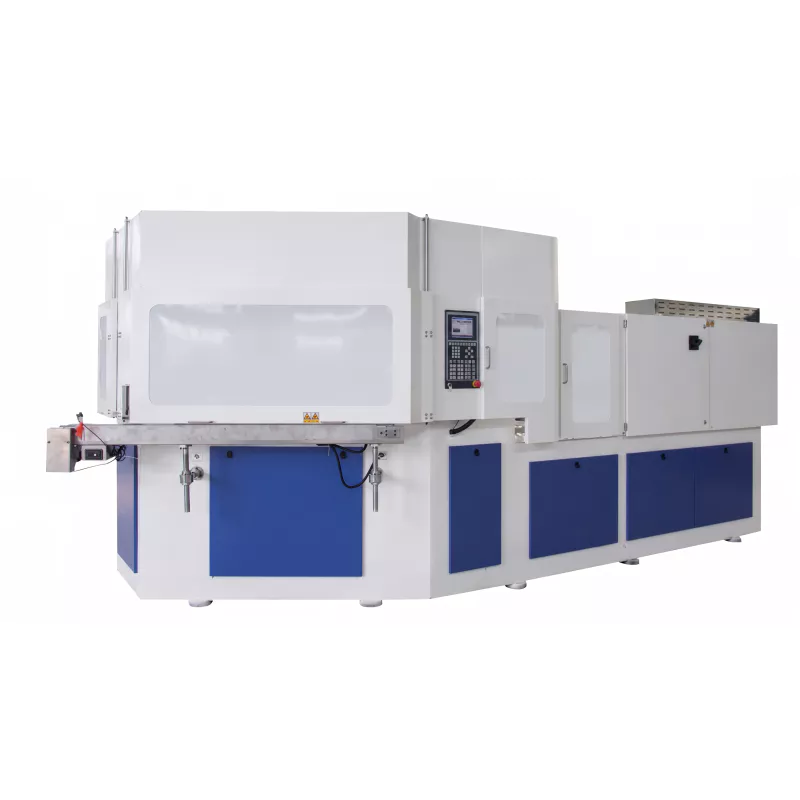
Fig 5 — ZQ110 IBM machine with servo-driven clamping system for energy-efficient high-speed production
11. Frequently Asked Questions
What power supply does an IBM machine require?
Most IBM machines require 380V / 50 Hz / 3-phase power with a dedicated breaker sized at 1.25× the machine rated current. verify with the manufacturer datasheet for the specific model.
How long does it take to install and commission an IBM machine?
A straightforward installation with pre-prepared utilities typically takes 2–5 days for mechanical and electrical connection, followed by 1–3 days of trial production and parameter optimisation.
What compressed air pressure does an IBM machine need?
IBM machines require a stable compressed air supply at 0.8–1.0 MPa (8–10 bar). Fluctuations above 15% can cause inconsistent blowing and dimensional variation.
Do I need a chiller for an IBM machine?
Yes. A water chiller maintaining 8–15 °C coolant temperature is standard. Mold temperature control directly affects cycle time, surface finish, and dimensional stability.
What is the correct torque for mold mounting bolts?
Always follow the mold manufacturer datasheet. Typical M16 bolts for medium IBM molds are torqued to 120–150 Nm in three cross-pattern stages.
How many operators are needed for an IBM production line?
A standard IBM line requires 1 machine operator for parameter monitoring and 1–2 quality inspection personnel per shift. Automated downstream handling can reduce total headcount further.
12. Conclusion
A successful first IBM machine startup comes down to methodical preparation: stable utilities, precisely aligned molds, fully dried materials, and patient incremental parameter optimisation. Follow the sequence in this guide, document every reading, and you will reach stable production far faster than operators who skip steps.
Our team provides remote commissioning support and on-site training for all machines in our range. Visit the IBM machine catalogue for full technical specifications, or contact us to arrange a commissioning engineer visit.