
What Are the Common Faults of ISBM Machines and How to Fix Them?
Unplanned downtime on an injection stretch blow molding machine is expensive — not just in lost production, but in the cost of scrap material, energy wasted heating up a stopped machine, and the knock-on effects through downstream filling and packaging operations. A well-maintained ISBM machine with a trained operator who can rapidly identify and resolve faults is a competitive advantage.
This fault diagnosis guide covers the ten most commonly encountered ISBM faults, organised by process stage, with the root cause analysis, diagnostic steps, and corrective actions needed to return the machine to production as quickly as possible. A preventive maintenance schedule is also provided to help avoid recurrence.
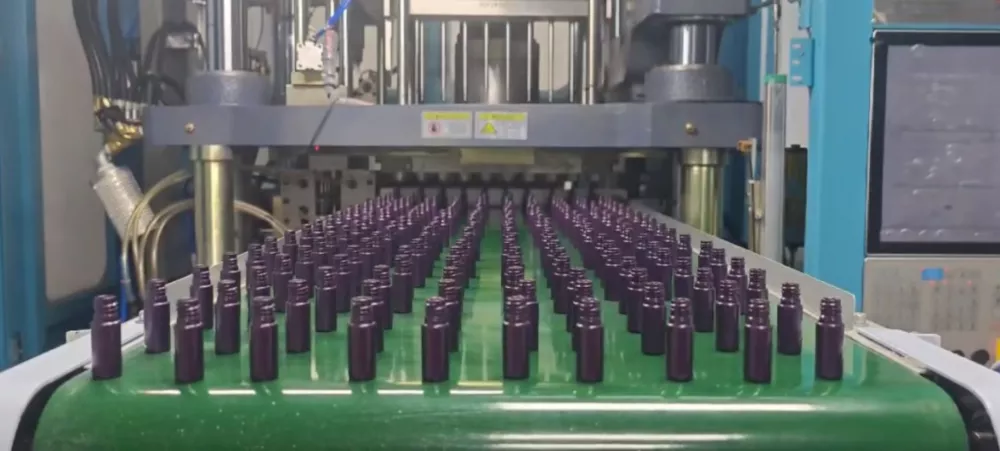
Fault Category Overview
| Category | Faults Covered | Primary Impact |
|---|---|---|
| Injection / Preform | Short shot, gate defects, black specks, hot runner drool | Scrap rate, material waste |
| Conditioning | Pearlescence (PP), haze (PET), neck distortion | Visual rejection, mechanical failure |
| Stretch-Blow | Wall thickness variation, gate puncture, incomplete fill | Structural failure, scrap |
| Ejection / Mold | Mold sticking, bottle deformation at eject | Downtime, mold damage |
| Machine / Electrical | Pressure and temperature alarms, servo faults | Production stop |
Fault 1 — Preform Short Shot or Incomplete Fill
Root Causes:
- Shot size set too small — insufficient material metered
- Back pressure too low — poor melt uniformity, poor shot repeatability
- Injection speed too slow — material solidifies before cavity is full
- Hot runner gate partially blocked — reduced flow to affected cavity
- Material feed interruption — bridging in hopper or inadequate drying
Corrective Actions:
- Verify shot size setting against calculated preform weight; increase if short
- Increase injection speed in 10% increments, monitoring for flash
- Check hot runner temperature at each zone; raise sticking zone by 5°C
- Purge barrel with 3–5 purge shots; inspect nozzle tip for cold plug
- Check hopper level and dryer operation; verify resin flow at throat
Fault 2 — Gate Blush, Stringing, or Gate Vestige Problems
Root Causes and Fixes:
| Defect | Cause | Fix |
|---|---|---|
| Gate blush (halo) | Gate tip too cold; material solidifying at gate | Raise gate zone temperature 3-5°C |
| Stringing / hairing | Gate tip too hot; material drools on retract | Reduce gate zone temperature; add screw decompression |
| Long gate vestige | Gate tip wear; tip geometry incorrect | Inspect and replace hot runner gate tip |
Fault 3 — Uneven Wall Thickness in Blown Bottle
Root Causes:
- Preform body temperature non-uniform — hot spots and cold spots
- Stretch rod not centered on gate — eccentric axial stretch
- Rod reaching full stroke before pre-blow initiates — base pile-up
- Non-uniform conditioning zone temperatures across preform zones
Corrective Actions:
- Measure preform temperature profile with IR gun at multiple zones — adjust conditioning zone setpoints to equalise
- Check rod alignment: use an alignment indicator to verify rod tip centres to gate within 0.3mm
- Adjust pre-blow timing to initiate earlier — reduce delay if base is too heavy
- If thick base persists despite correct temperatures, the rod stroke may be too short — increase rod stroke setting
Fault 4 — Whitening or Haze in PET Bottle Body
Two distinct root causes must be distinguished:
Preform body too hot at conditioning station — cold crystallinity forms before blow. Haze pattern uniform across bottle body. Fix: reduce conditioning temperature 5°C at a time; check heating element output; verify cycle time is not too long (preform dwelling too long in conditioning).
Resin moisture too high — hydrolytic degradation during injection produces low-molecular-weight oligomers that scatter light. Haze often accompanied by brittleness and reduced bottle weight. Fix: extend drying time; check dryer dew point; verify Karl Fischer moisture reading below 50 ppm.
Fault 5 — Pearlescence in PP Bottles
Root Cause: Preform body temperature entering the blow station is too high for the specific PP grade being processed — the polymer has begun to form unoriented spherulitic crystallites before orientation can occur. PP’s orientation window is very narrow (approximately 125–140°C), and exceeding the upper bound causes this classic pearlescence defect.
Corrective Actions:
- Reduce conditioning station temperature by 3–5°C increments
- Check that preform neck cooling is functioning — hot neck can absorb heat back into body
- Verify PP grade: use random copolymer PP with nucleating agent for clarity applications; homopolymer PP will always pearl
- Reduce conditioning dwell time if excess heat is accumulating from retained injection energy
Fault 6 — Stretch Rod Marks or Gate Puncture
Root Causes and Corrective Actions:
- Pre-blow pressure too low: rod contacts unprotected gate area and forces it — increase pre-blow pressure by 1–2 bar
- Pre-blow delayed too late: rod tip reaches gate before air contacts preform — advance pre-blow initiation timing relative to rod start
- Preform too cold: material is insufficiently mobile to stretch away from rod tip — increase conditioning temperature
- Rod tip condition: worn, chipped, or rough rod tip causes marking even when process is otherwise correct — inspect and replace stretch rod tip
Fault 7 — Mold Sticking or Difficult Part Ejection
Root Causes and Corrective Actions:
- Mold temperature too warm: bottle has not cooled sufficiently before mold opens — lower mold temperature or increase blow time; extend cooling phase
- Bottle wall too thin: insufficient rigidity for clean ejection — investigate wall thickness distribution
- Mold surface condition: rough parting line or worn draft angles create mechanical lock — polish mold cavity; verify draft angles minimum 1°
- Mold venting blocked: air cannot escape during ejection, creating suction — clean vent channels; verify vent depth (typically 0.015–0.03mm)
- Ejector pin worn or misaligned: check ejector pin travel and alignment; replace worn pins
Fault 8 — Hot Runner Drool or Black Specks
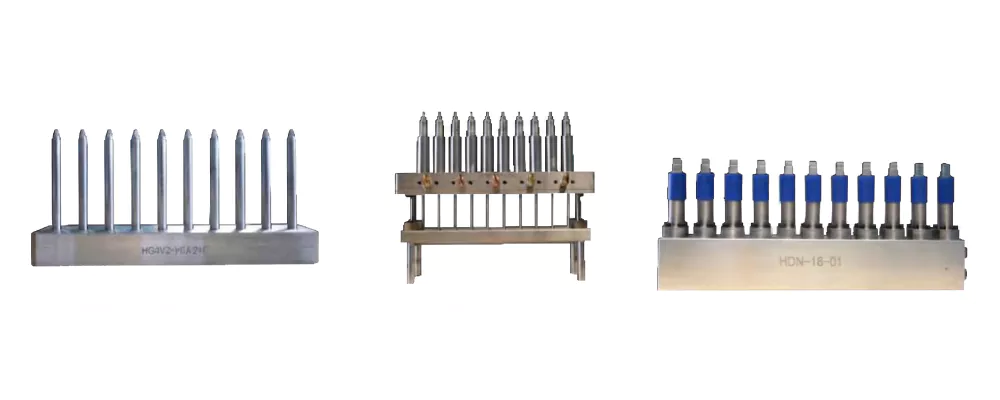
- Drool: Hot runner gate tip too hot — reduce gate zone temperature; add screw decompression stroke
- Black specks — degraded material: material residence time in barrel or hot runner manifold too long — reduce stock temperature; increase injection frequency; purge barrel with commodity-grade PET before production restart
- Black specks — contamination: check screw, barrel, and non-return valve for wear-through of chrome plating or corrosion deposits — inspect and replace worn components
Fault 9 — Machine Alarm: Pressure Out of Range
| Alarm Type | First Check | Next Step |
|---|---|---|
| Low blow pressure alarm | Booster compressor operating? HP air pressure gauge reading? | Check booster compressor motor, inlet air filter, pressure switch setting |
| High hydraulic pressure alarm | Is mold closed fully? Is there debris in mold parting line? | Check hydraulic oil level and temperature; inspect relief valve setting |
| Low LP pneumatic alarm | Compressor running? Service regulator setting? | Check for air leaks at fittings; replace worn seals on cylinders |
Fault 10 — Bottle Fails Top-Load or Collapses
Root Causes and Corrective Actions:
- Insufficient biaxial orientation: ASR and/or HSR below target — verify stretch ratio settings against design; measure wall thickness distribution
- Preform temperature too low or too high: both extremes produce weaker orientation — verify conditioning temperature is within the 90–105°C window (PET)
- Wall too thin overall: preform design or resin IV may have changed — verify preform weight and IV of resin lot
- Hot-fill or post-fill temperature: if product is hot-filled above 55°C, standard ISBM PET without thermal crystallisation will soften — this is a design issue, not a machine fault
Preventive Maintenance Schedule
| Frequency | Task |
|---|---|
| Daily | Check oil level in hydraulic reservoir and lubrication system |
| Verify chilled water supply temperature and flow rate | |
| Inspect mold cavity surfaces and gate area for deposits; clean with approved cloth | |
| Weekly | Clean hopper and dryer filters |
| Inspect stretch rod for wear, scoring, or misalignment | |
| Check all safety interlock switches for function | |
| Monthly | Replace hydraulic oil filter; sample oil for particle analysis |
| Grease all specified lubrication points per machine manual | |
| Inspect hot runner heater zones for resistance drift; replace heaters showing deviation >10% | |
| Quarterly | Full mold disassembly and cleaning; inspect cavity polish and vents |
| Replace screw barrel temperature barrel zone thermocouples showing drift |
For ISBM machines with persistent fault patterns not resolved by the above corrective actions, contact our technical support team. We provide fault logs analysis, remote diagnostic support, and on-site service visits for all machine models we supply. Submit your fault details here for priority support.
Frequently Asked Questions
How do I differentiate between a material problem and a machine problem when a fault appears?
Can I run the ISBM machine with one cavity blocked if a gate tip fails?
Why does my ISBM machine run well on the morning shift but produce defects in the afternoon?
Recurring ISBM Machine Fault? Get Expert Diagnosis.
Describe the defect, your current parameters, and the resin you are using — our process engineers will diagnose remotely in most cases.